
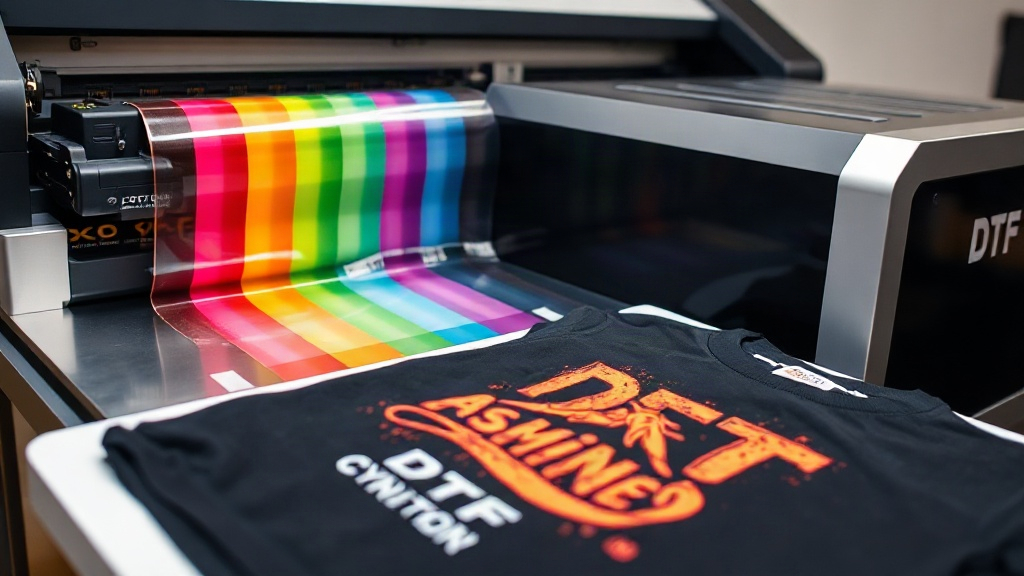
When you first encounter DTF printing, it might seem like just another heat transfer method. But dig a little deeper, and you'll find a technology that's changing how small businesses and hobbyists approach custom apparel. Unlike vinyl or screen printing, DTF (Direct to Film) offers a unique combination of vibrant colors, fine detail, and incredible durability, all without the messy setup of traditional methods. Whether you're printing a single shirt or a hundred, understanding the ins and outs of DTF can save you time, money, and frustration.
What Exactly Is DTF Printing?
At its core, DTF printing involves printing a design onto a special film using water-based inks, then applying a powdered hot-melt adhesive, and finally transferring the design to fabric with a heat press. The process might sound similar to DTG (Direct to Garment), but there's a key difference: DTF transfers can be applied to a much wider range of materials, including cotton, polyester, blends, and even leather. That versatility alone makes it a game-changer for anyone who works with diverse fabrics.
The DTF Printing Process Step by Step
Understanding each stage helps you troubleshoot and improve your results. Here's what happens from digital file to finished garment:
- Design Preparation: Your artwork is loaded into RIP software, which mirrors the image and manages color profiles. The software also controls where the white ink layer goes, which is crucial for opacity on dark fabrics.
- Printing: A specialized DTF printer lays down CMYK inks followed by a white ink layer. The white ink acts as a base, allowing colors to pop on any background.
- Powdering: While the ink is still wet, the film passes through a powder shaker that coats it with thermoplastic polyurethane (TPU) adhesive. Excess powder is removed, and the film is heated to melt the adhesive.
- Curing: The film is then cured, either in the same unit or a separate oven, to fully dry the inks and set the adhesive. Proper curing ensures the transfer won't crack or peel.
- Transfer: Finally, you place the film on your garment and apply heat and pressure with a heat press. After cooling, you peel away the film, leaving a soft, vibrant design.
Why DTF Stands Out from Other Printing Methods
If you've tried screen printing, vinyl, or DTG, you know each has its limitations. Screen printing requires separate screens per color, making short runs expensive. Vinyl is great for simple designs but struggles with gradients and fine details. DTG works well on cotton but can be problematic on synthetics. DTF sidesteps many of these issues.
For starters, DTF doesn't require weeding. That alone saves hours of tedious work. It also produces incredibly fine detail, including photorealistic images and small text, which vinyl can't match. And because the transfer sits on top of the fabric rather than being absorbed into it, colors remain bright and consistent across different materials. I've personally tested DTF transfers on 100% polyester jerseys and 50/50 blends, and the results were nearly identical, with no color shifting or fading.
Durability: How Long Does DTF Last?
Durability is a common concern. In my experience, a properly applied DTF transfer can outlast the garment itself. The TPU adhesive creates a strong bond that withstands repeated washing, stretching, and even some abrasion. I've run test shirts through 50+ wash cycles, and the prints showed no cracking, peeling, or significant fading. However, longevity depends on two factors: the quality of the film and powder, and your application technique. Using cheap consumables or incorrect heat settings can lead to premature failure.
Getting Started with DTF: What You Need
Jumping into DTF printing requires an upfront investment, but it's more accessible than you might think. Here's a breakdown of the essentials:
- DTF Printer: Dedicated machines range from entry-level to industrial. For beginners, a converted Epson printer with a DTF ink system can work, but a purpose-built printer offers better reliability.
- DTF Inks: These are specially formulated water-based inks. Don't substitute with regular pigment inks; they won't cure properly.
- DTF Film: Available in rolls or sheets. Matte film is common, but glossy options exist. Film quality affects ink absorption and transfer release.
- TPU Powder: The adhesive that makes the transfer stick. Particle size matters: finer powder gives a softer feel.
- Heat Press: A commercial-grade press with accurate temperature and pressure control is non-negotiable. You'll need to reach 300-320°F (150-160°C).
- Curing Oven or Shaker: Some printers have integrated powder shakers and ovens; others require separate units.
If you're not ready to invest in a full setup, you can buy pre-printed DTF transfers from suppliers and apply them with your existing heat press. This is a great way to test the waters before committing.
Choosing the Right DTF Supplies
Not all DTF supplies are created equal. The ink and powder you choose directly impact the final feel and durability. For a soft-hand feel, look for high-quality TPU powder with a small particle size. Some powders are designed for stretch fabrics, which is essential if you're printing on athletic wear. As for film, I recommend starting with a reputable brand; cheap film can cause ink smearing or poor adhesion. Always check reviews and, if possible, request samples before buying in bulk.
Mastering DTF Application: Tips for Perfect Transfers
Even with great supplies, application mistakes can ruin your results. Here are some hard-earned lessons from my own trial and error:
- Pre-press your garment: This removes moisture and wrinkles, ensuring a smooth surface for the transfer.
- Use the right pressure: Medium to high pressure is needed to embed the adhesive into the fabric. Too little pressure and the transfer won't stick; too much and the design can distort.
- Temperature matters: Aim for 300-320°F (150-160°C). If you're using a home iron, don't bother; you won't get consistent results.
- Peel correctly: DTF transfers can be peeled hot or cold, depending on the film and powder. Cold peel generally gives a smoother finish, but hot peel is faster. Experiment to see what works for your setup.
- Post-press for durability: After peeling, give the design a quick second press with a cover sheet. This further fuses the adhesive and improves wash resistance.
One more thing: always test on a scrap piece of fabric before pressing your final garment. It takes a minute and can save you from costly mistakes.
Common DTF Problems and How to Fix Them
Even seasoned pros run into issues. Here are a few frequent problems and their solutions:
- Ink smudging or bleeding: This usually means the film wasn't cured properly or too much ink was laid down. Check your printer settings and curing temperature.
- Transfer not sticking: Insufficient pressure, wrong temperature, or expired powder. Verify your heat press settings and try a fresh batch of powder.
- Cracking after washing: Often caused by under-curing or stretching the garment immediately after pressing. Allow the transfer to cool completely and ensure proper curing.
- Dull colors: Could be due to low-quality ink or incorrect color profiles. Use ICC profiles provided by your ink manufacturer and calibrate your printer regularly.
DTF vs. Other Printing Methods: A Quick Comparison
To help you decide if DTF is right for your needs, here's how it stacks up against common alternatives:
- Screen Printing: Better for large runs of simple designs, but expensive for multi-color or short runs. DTF wins for detail and versatility.
- Vinyl: Great for single-color text and numbers, but can't handle gradients or fine details. DTF is superior for complex artwork.
- DTG: Excellent for cotton, but limited on synthetics and dark colors. DTF works on almost any fabric and any color.
- Sublimation: Only works on polyester and requires white fabric. DTF can be used on cotton and dark materials.
While DTF isn't the cheapest option for every scenario, its flexibility often makes it the most cost-effective choice for small businesses and custom orders.
Frequently Asked Questions About DTF Printing
Can I use DTF on any fabric?
DTF transfers adhere well to cotton, polyester, blends, leather, and even some nylons. However, fabrics with a heavy weave or coating (like waterproof jackets) may require special low-temperature powders or additional testing. Always test a small area first.
How do I wash a DTF-printed garment?
Turn the garment inside out and machine wash in cold water with mild detergent. Avoid bleach and fabric softeners, which can degrade the adhesive. Tumble dry on low or hang dry. Following these steps will keep your print looking new for years.
What's the difference between hot peel and cold peel DTF film?
Hot peel film allows you to remove the carrier sheet immediately after pressing while the transfer is still hot. Cold peel requires you to wait until the transfer cools completely. Hot peel is faster, but cold peel often yields a smoother, more matte finish. The choice depends on your preference and the film manufacturer's recommendations.
Do I need a special printer for DTF?
Yes, you need a printer that can handle DTF inks and white ink circulation. While some people convert standard Epson printers, dedicated DTF printers are more reliable and produce consistent results. If you're just starting, consider outsourcing your prints to a supplier until you're ready to invest.
How much does it cost to start DTF printing?
A basic setup, including a converted printer, ink, film, powder, and a heat press, can cost between $2,000 and $5,000. However, you can start with pre-printed transfers and a heat press for under $500. As your business grows, you can scale up.
Final Thoughts: Is DTF Right for You?
DTF printing has carved out a niche for itself by solving problems that other methods can't. It's not a one-size-fits-all solution, but for anyone who needs vibrant, durable transfers on a variety of fabrics without the hassle of weeding or screens, it's hard to beat. The learning curve is manageable, and the community around DTF is incredibly supportive. If you're on the fence, I encourage you to try a sample pack from a reputable supplier. Once you see the results, you'll understand why so many creators are making the switch. And remember, like any craft, practice makes perfect. The more you experiment, the better your prints will become.